Managing Appointments
There are three ways within mCB to create and manage the appointments which are offered to your patients:
- By adding single/recurring appointment slots using Bookings > Add new times as described in the Clerk User Guide
- Via the Bookings > Service timetable as described in the Clerk User Guide
- By adding a series of recurring appointments using Bookings > Appointment time rules .
What are Appointment Time Rules?
The Appointment time rules function allows a mCB Administrator to create rules around how appointments are generated e.g., duration, availability, and the services and clinics to which they apply.
There are two types of rules:
- A Temporary rule has a given Start and End date, to cover a specific time frame (for example, during a holiday period)
- A Permanent rule is one which relates to the normal running of your clinics and services.
Appointment time rules may seem complicated at first, however once they are created, they are an easy way to manage the appointments you offer at your clinics.
There are three steps to creating appointment times using the Appointment time rule:
- Define and create the Rule (e.g., its Name, whether it is Temporary or Permanent and the Services to which it applies)
- Define the timetable (i.e., the appointment times which are connected to the rule)
- Create (or generate) the appointment timetable.
You can create multiple Appointment time rules to suit the needs of your clinics and services.
Do I need Appointment time rules?
In short, the answer is no. You can manage your clinics by using the Add new times and Service timetable options. However, you may find the Appointment time rules more time efficient.
How do I know what Appointment time rules already exist?
To see existing Appointment time rules, follow
Bookings > Appointment time rules
from the Navigation Bar.
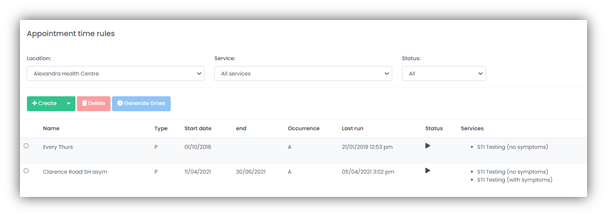
The overview screen displays all rules which exist at the location specified, including:
- The rule Name
- The rule Type (Permanent or Temporary)
- The Start date of the rule
- The End date of the rule (if applicable)
- The Occurrence of the rule (e.g., Weekly, Bi-Weekly, etc.)
- When the rule was Last run
- The Status of the rule (Active or Inactive)
- The Services the rule applies to.
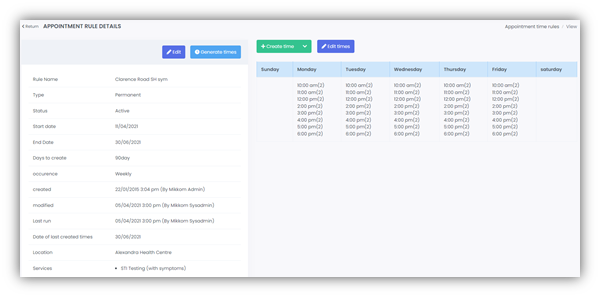
To view the specific details of a rule, select anywhere on the rule description row to be taken to the Appointment rule details screen.
How do I define and create an Appointment time rule?
To create a new Appointment time rule follow
Bookings > Appointment time rules
from the Navigation Bar.
Time rules are location specific. Change the location using the drop-down option.
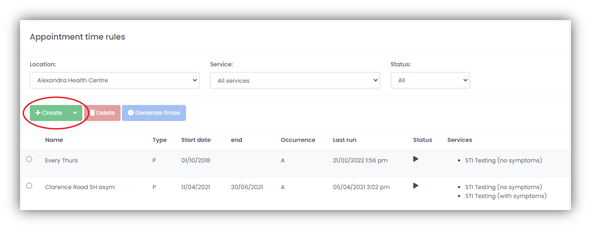
Select
Create > New rule
using the drop-down option. This takes you to the Create new rule screen:
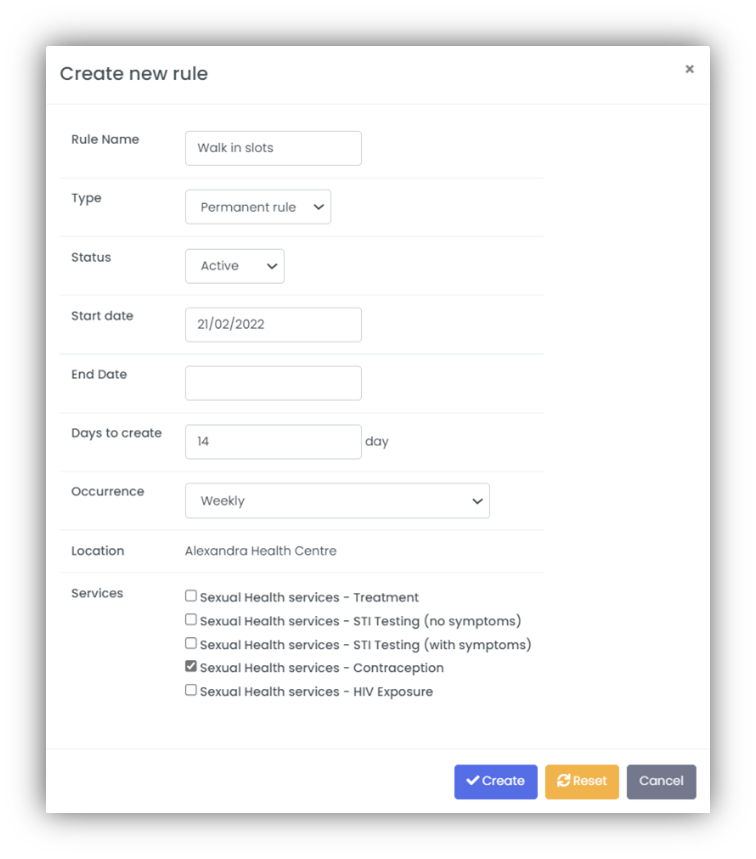
Rule name: Make this name as self-explanatory as possible e.g. Summer Clinic or Weekly Clinic.
Type: Permanent (used for business as usual) or Temporary (for a fixed time frame).
Status: Active or Inactive.
You can only generate times with an Active rule. Whilst defining your rules, you may wish to set them to Inactive to avoid running them by accident.
Start date: The date the rule will commence.
End date: The date the rule will end.
It is not necessary to specify an End date when creating a Permanent rule, however if one is used, this will override the Days to create end date if the specified End date occurs first.
Days to create: Used for Permanent rules only, this specifies for how many calendar days the timetable should be generated for.
Occurrence: Specifies how to repeat generated times based on the timetable. The options are:
- Weekly - create specifed times every week
- Biweekly (even) - create specified times for weeks with an even number
- Biweekly (odd) - create specified times for weeks with an odd number
- 1st, 2nd, 3rd, 4th, or 5th Occurrence of a weekday in a month.
Location: The Clinic location to which this rule applies (pre-populated by the system).
Services: The Service(s) to which this rule applies e.g., dentistry.
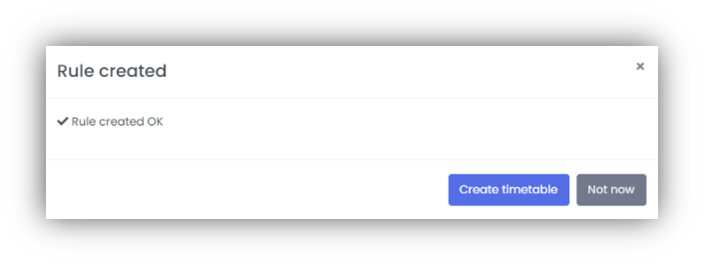
All fields need to be completed before selecting Create; a pop-up box will confirm the rule has been created.
You can then proceed to create the timetable or choose to create it another time.
How do I define and create a timetable?
The timetable is the how you define the appointment times which will be offered to your patients.
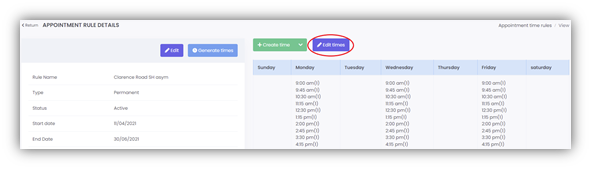
You can define your timetable immediately after creating your Appointment time rule, or you can come back and create it later by selecting Edit times when viewing the rule from within the Appointment rule details screen.
To create a new timetable, follow
Bookings > Appointment time rules
from the Navigation Bar. Select the rule that you want to create the timetable for and select Create time. A drop-down option is available to enter a single time (e.g., at 9:00) or multiple times throughout the day e.g. (09:00 – 17:00).

For illustration purposes, below we will create multiple appointment times, offered 3 days a week:
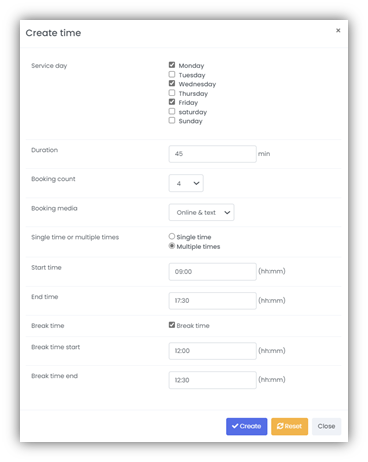
Service day: Select the days of the week you wish to create the rule for.
Duration: Enter the duration of the appointment time e.g. 45mins.
Booking Count: Enter how many appointment slots are available to be booked.
Booking Media: Choose how the appointments can be booked e.g. online/ text or both.
Single time or multiple times: Defaulted to your earlier menu choice.
Start Time: The start time of the first appointment offered.
End Time: The end time of the final appointment offered.
If a break in appointment times is required select the break time box, along with the Start and End time of the break. No appointments will be created during this time.
If your organisation uses shift patterns, you can create multiple entries (e.g., Morning, Afternoon, Evening), each with their own break time.
On selecting Close, you will be presented with a summary of the timetable which you have created.
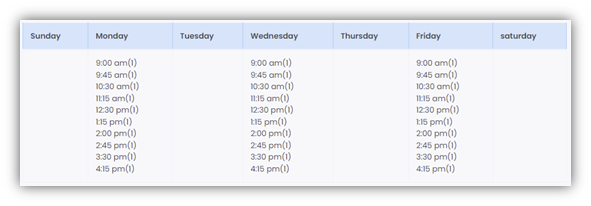
Hovering over an appointment time will display the timetable information.
The appointments themselves have not yet been created – this is the 3rd and final step of using Appointment time rules.
How do I generate the appointment times from a timetable?
Once you have defined your time rule and your timetable, you can generate the appointments so that patients can book them.
You can only generate times for Active Appointment time rules.
Follow
Bookings > Appointment time rules
from the Navigation Bar and select the Appointment time rule.
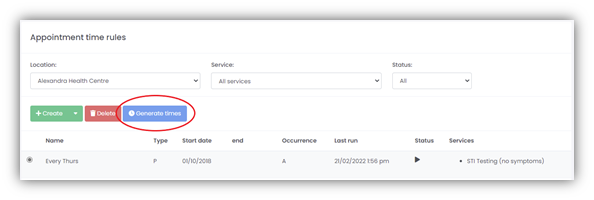
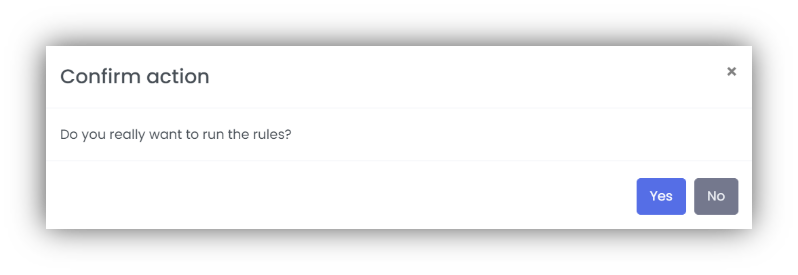
To run the rules, select Generate times. A pop-up will prompt you to confirm, select Yes to complete the action.
The times will be created according to the definition of your rule and your timetable.
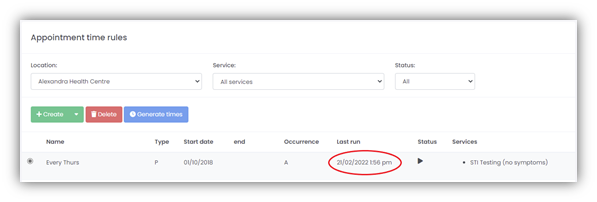
After generating times, the Last run information will be updated on the Appointment time rules screen to show the date & time the rule was last run.
This information can also be seen from within the Appointment rule details screen for the specified rule.
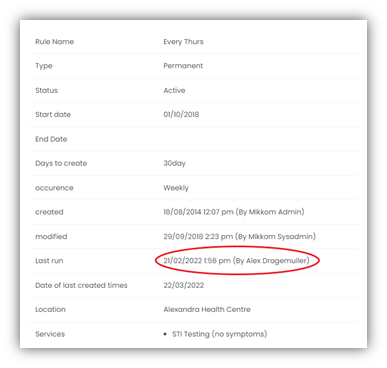
The Generate times action can also be triggered from within the Appointment rule details screen of a specific rule.
Keep in mind when editing an existing Appointment time rule and attaching another service to the list that the rule will continue to apply to all the services (including the new one) from the date specified in the 'Date of last created times'. No retroactive action will be taken.
How do I change an Appointment time rule timetable?
To change an Appointment time rule timetable, follow
Bookings > Appointment time rules
from the Navigation Bar.
From the Appointment rule details screen, select Edit times.
Changing an Appointment time rule timetable does not affect any appointments already generated. Changes will take effect from the next request to generate times.
The appointment slots now appear with a checkbox next to each day and each timeslot.
You can edit a whole day, individual timeslots, or, as illustrated, you can edit multiple timeslots in one go.
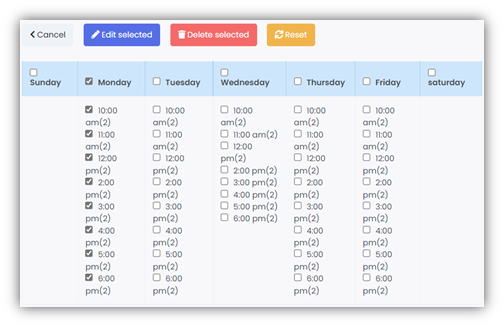
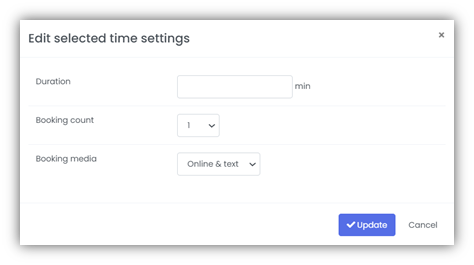
Select Edit Selected to change the duration of the appointment(s), the number of appointment slots available, or how the bookings can be made.
To delete appointment slots, select the timeslots and select Delete Selected.
You can only delete appointment slots which have not already been booked. To delete all the appointment slots, you must cancel all booked appointment slots first.
Timeslots are deleted immediately. There is no confirmation option.
Deleting the timeslots created by the rule will also set back the "Date of last create times" value. This updated value will be used when running the rule again to generate times.
Can I create an Appointment time rule which covers multiple locations?
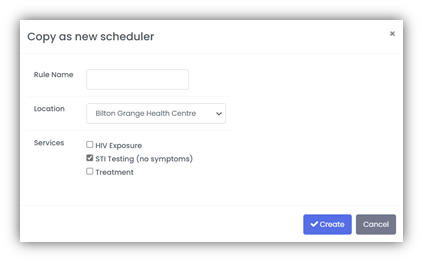
It is not possible to create one rule for multiple locations, as each location is likely to offer different services that may not be applicable to the appointment rule. However, you can copy a rule and change the location of the copy.
From within Bookings > Appointment time rules, select the radio button next to the rule you wish to copy.
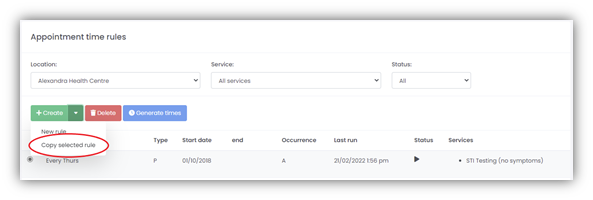
Select the dropdown button next to Create, then select Copy selected rule, give the rule a name and enter the location using the drop-down, finally check the relevant service box and select Create.
How do I delete an Appointment time rule?
From within Bookings > Appointment time rules, select the radio button next to the rule you wish to delete.
To delete a rule select delete, a pop-up will ask you to confirm.
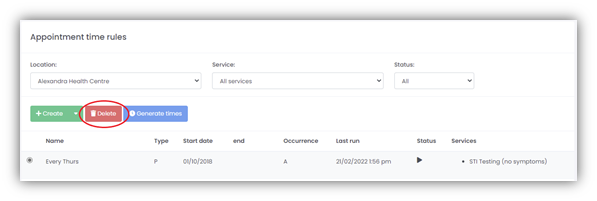
Deleting the rule will not delete any appointments which the rule has created.
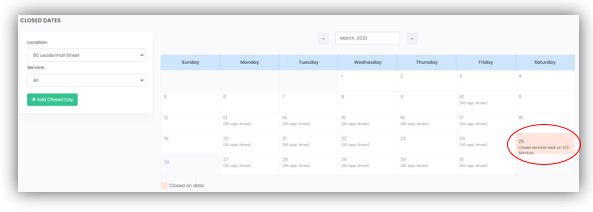
What are Closed dates and how do I create one?
Closed dates, used in conjunction with appointment time rules, are a way of ensuring that on the days on which your clinics are closed (such as bank holidays) appointments will not be generated for those days.
To define a Closed date, navigate to
Bookings > Closed dates
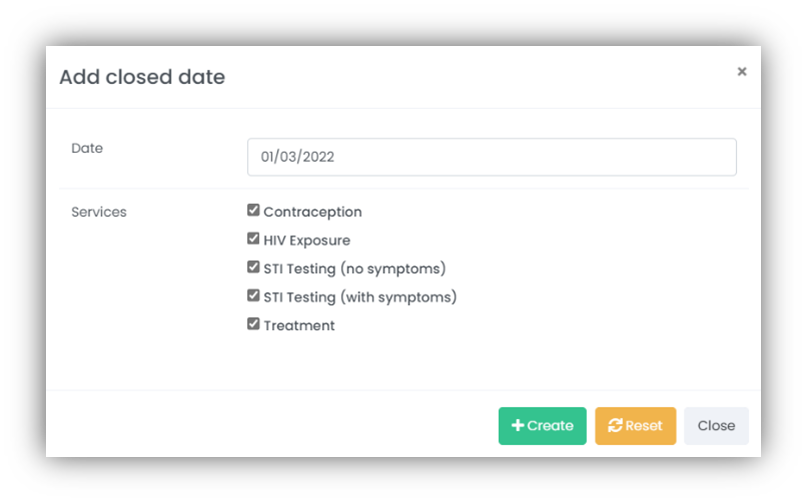
, and select Add Closed Day.
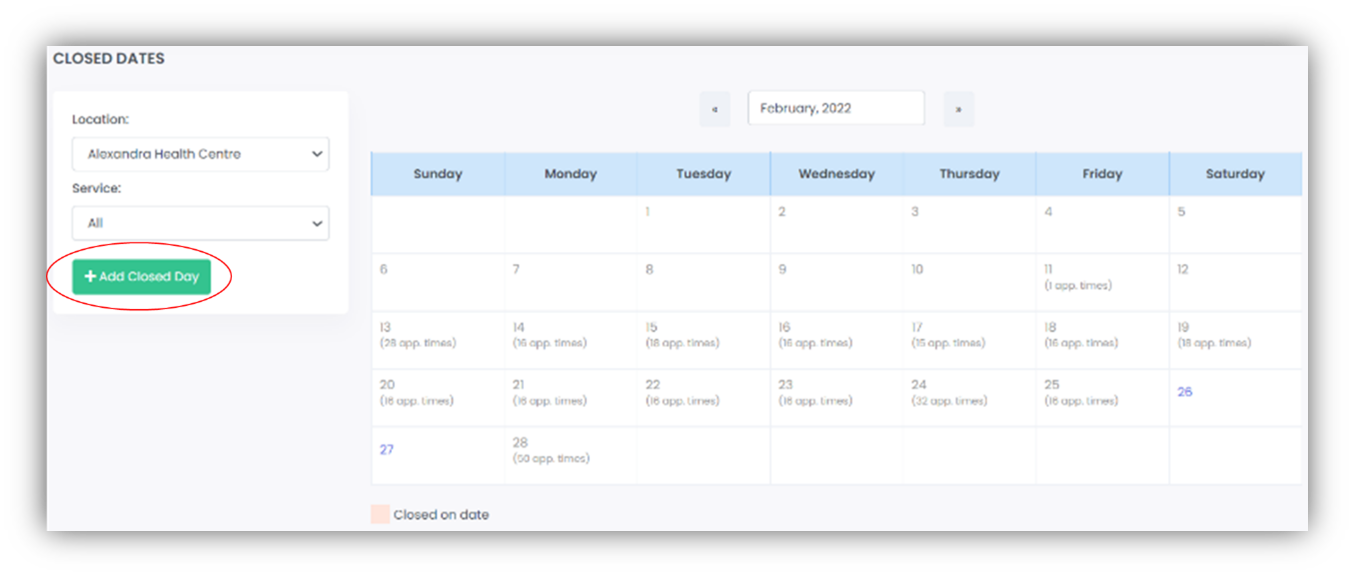
Then simply enter the date you wish to be considered a Closed date, select the services which are to be closed, and select Create. All closed dates are clearly visible, highlighted in Pink.
Closed dates do not work with appointment slots created using Add new times; they only work in conjunction with Appointment time rules.
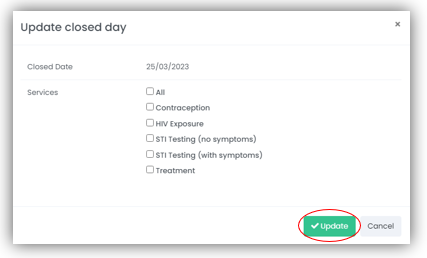
How do I open a date marked as closed?
First, navigate to Bookings > Closed dates and select the date you wish to open.
Untick all boxes listed under Services and select Update. The selected date will now be available for appointment times.