Managing Clinic Appointments
In addition to showing the appointment information for your Clinic Location, the Appointments screen also allows management of the clinic’s appointments, for example by allowing you to Confirm, Cancel or Rebook a patient appointment.
Select
Bookings > Appointments
from the Navigation Bar.

How can I see who is due to come to my clinic today?
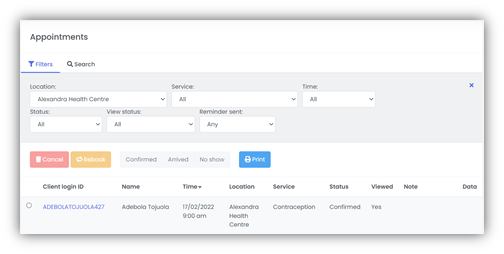
By default, the Appointments screen shows all the bookings for the selected clinic today (regardless of the appointment status).

Remember you can change data displayed in the Appointments screen by using the drop-down menu options as explained in
Viewing your Clinic Appointments.
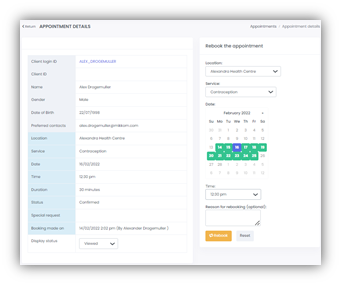
Appointment Details
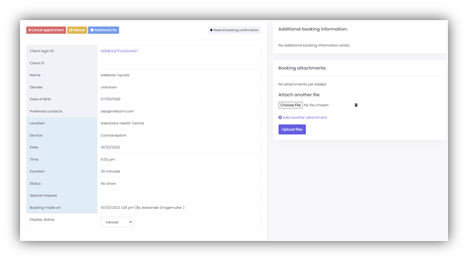
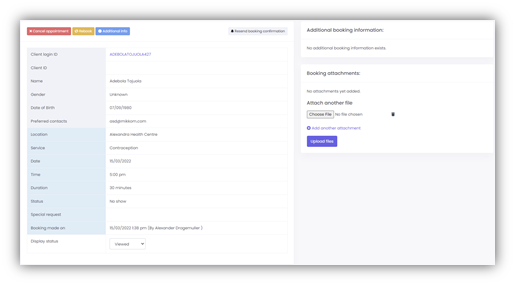
Click on the Client Login ID to be taken to the Client details screen. Click anywhere else on the appointment line to be taken to the Appointment details screen.
This screen displays more information relating to the client, such as gender, date of birth, contact information, and appointment data, such as duration, and special requests.
How do I check-in a patient who has arrived for their appointment?
Once a patient has arrived at your clinic for their appointment, select the radio button next to their name, then click on Arrived. The patient status will then change from ‘Confirmed’ to ‘Arrived’.
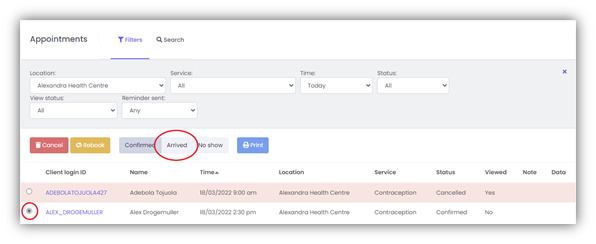
How can I monitor the no-shows to my clinic?
To see the no-shows in your clinic, from within the Appointments screen, change the Status drop-down filter to No show.

Appointments status can only be set to Arrived or No show on the day of the appointment or later.
How do I make an appointment for an exisiting patient?
To make an appointment for an existing patient, first follow the instructions within the section
How do I find an existing patient? to select the patient who needs an appointment.
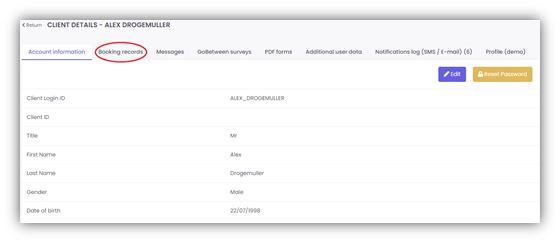
Once in the Account information screen click on the Booking records tab to see the patient’s booking history.

Click on New appointment. The booking pop-up screen allows you to enter a location, select the desired service, date and time details for the appointment.
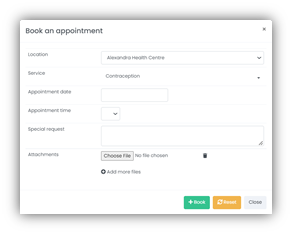
You can also enter any special request information related to the patient, and upload attachments related to patient's booking.
Some mCB configurations can also have optional, configurable fields to collect additional predefined data like the Patient ID.
Once all the appointment details are confirmed, select Book.
A notification will be sent to the patient via their preferred contact method to inform them of the details of their new appointment. If GoBetween is in use, the notification will be sent to their GoBetween inbox and an alert of a new GoBetween message will be sent to their preferred contact method instead.
How do I cancel a patient appointment?
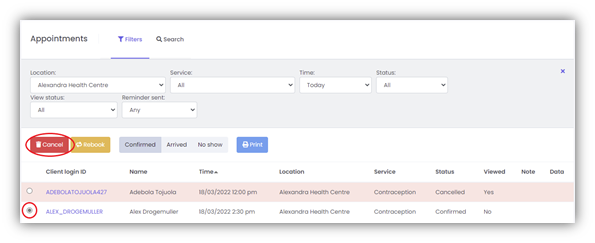
You can cancel a patient appointment at any time from the Appointments screen by selecting the radio button next to the Client login ID and selecting Cancel.
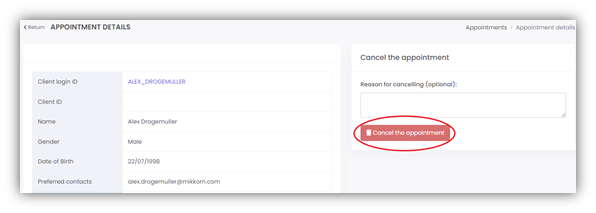
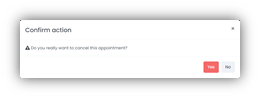
This will take you to the Appointments details screen where you have the option to enter a reason for the cancellation, or you can simply click Cancel appointment to continue the cancellation process. Upon confirmation, the appointment is cancelled.
Once an appointment has been cancelled the time slot will show as available in the system, allowing another patient to use that appointment slot. The patient status will change from Confirmed to Cancelled.
You can also cancel the appointment through the Booking records tab within Client Details in a similar fashion.
Alternatively, you can cancel an appointment directly through the Appointment details screen. Click on the appointment you wish to cancel from the Appointments screen, and then select Cancel appointment.
Once the cancellation has been processed, a notification will be sent to the patient via their preferred contact method to inform them of the cancellation. If GoBetween is in use, the notification will be sent to their GoBetween inbox and an alert of a new GoBetween message will be sent to their preferred contact method instead.
What is the Viewed Status used for?
Some organisations use more than one patient appointment booking system and have a need to manually transfer data from mCB into their other system(s).
The Viewed Status can be set within the Appointment details page and can hold the value of Not viewed (the default), Viewed and Copied. Simply change the value and select Update for the new status to be reflected within mCB.
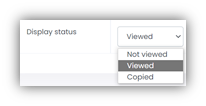
The Viewed Status can be seen at a glance, on the Appointments screen.
How do I rebook a patient appointment?
You can rebook a patient appointment at any time from the Appointments screen by selecting the radio button next to the Client login ID and selecting Rebook.
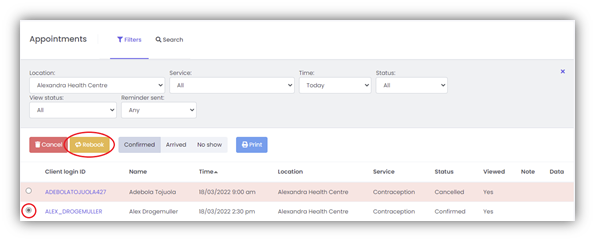
Selecting this option takes you to the Appointment details screen where you can select a new location, clinic, date, and time using the drop-down and calendar options. When completed, click on Rebook; mCB will cancel the original appointment and book a new one.
You will be prompted to confirm the new appointment before seeing the final confirmation screen.
You can also rebook the appointment through the Booking records tab within Client Details in a similar fashion.
Alternatively, you can rebook an appointment directly through the Appointment details screen. Click on the appointment you wish to rebook from the Appointments screen, and then select Rebook.
A notification will be sent to the patient via their preferred contact method to inform them of the cancellation, followed by a notification about the new appointment. If GoBetween is in use, the notifications will be sent to their GoBetween inbox and alerts of the new GoBetween messages will be sent to their preferred contact method instead.
How do I resend booking confirmation to my patient?
Navigate to the relevant Appointment details screen and select Resend booking confirmation. This will automatically send a notification to the patient via GoBetween if it is in use. Otherwise, the notification will be sent via their preferred contact method.

How do I know what appointment time-slots are available at my clinic at a glance?
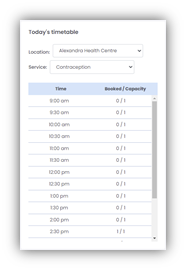
You can see a birds-eye view of today’s appointments using Today’s Timetable on the Dashboard. However, if you want to view appointment availability for different period (for example, the coming week) you can do this by navigating to
Bookings > Service timetable
.
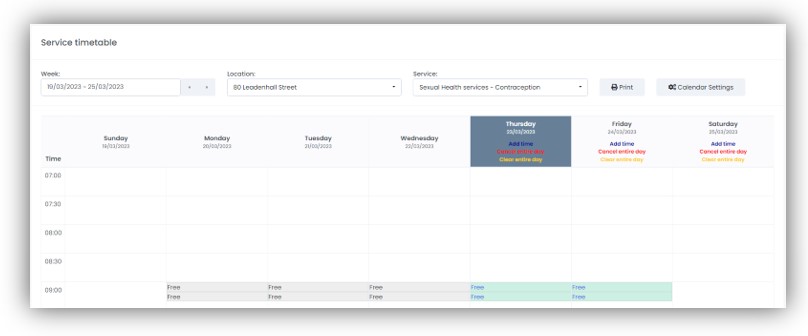
Service Timetable
The Service timetable displays a week at-a-glance appointment times and availability for a service during a specified timeframe in real time.
You can change the Location and Service using the drop-down options. To change the date range, select the field and use the calendar pop-up, or jump forward or back one week using the arrows.
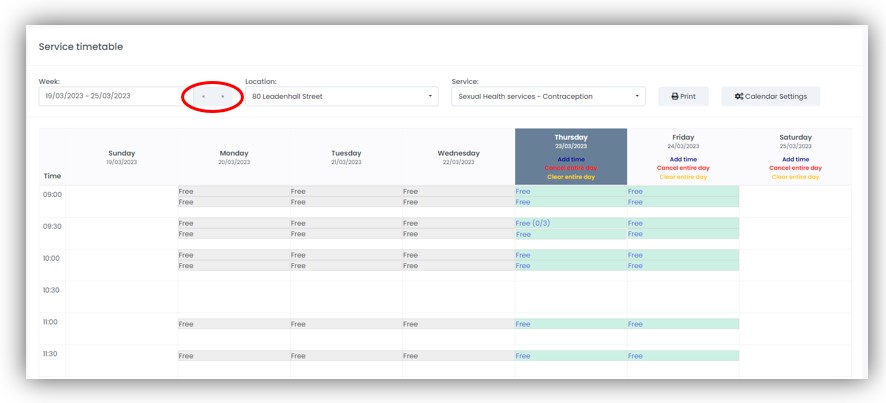
The Service timetable displays how many appointments are available for each time slot e.g., Free (0/3) denotes that there are three appointments slots available at the respective time, none of which have been selected. A simple designation of Free indicates that there is only 1 slot available for that time. An indicator of, for example, Free (1/3) would indicate that one of the three available slots had been booked, and so forth.
Appointment times shown in grey indicate that the appointment occurred in the past and therefore no changes can be made. Upcoming appointments are displayed in green.

The calendar start and end times can be configured under Calendar Settings.
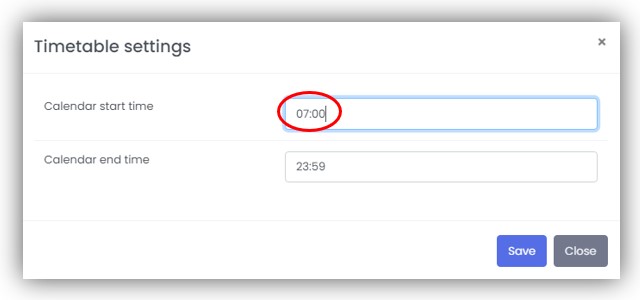
These changes will be reflected in the timetable.
How do I change existing appointment time-slot availability at my clinic?
The mCB Administrator creates the service timetable for each service and location.
The Clerk has the authority to add or remove extra time slots and appointments to help keep up with patient demand and resourcing issues.
To change appointment availability, navigate to
Bookings > Service timetable
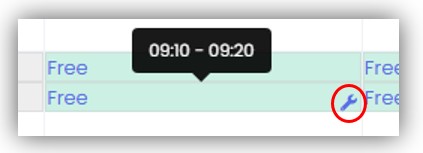
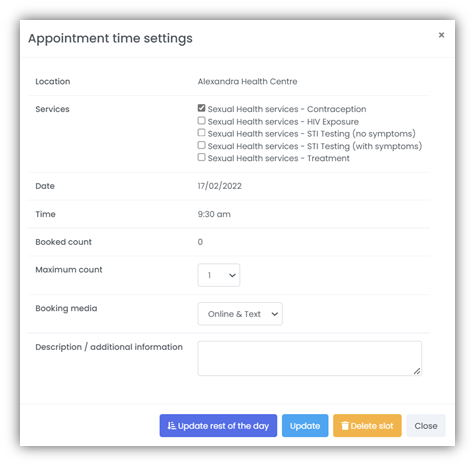
. Hover over the appointment time-slot you wish to change and click the spanner icon to display the Appointment time settings.
Increase or decrease the maximum count (of available appointments) using the drop-down function. The Booking media option determines how patients will be able to book their appointment. You can choose from Text, Online, and Online & Text using the drop-down option.
Select Update to update this appointment slot only. If you wish to make changes from the selected time onwards select Update rest of day. Saved changes will take effect immediately.
How do I create a new appointment time-slot?
Navigate to
Bookings > Add new times
.
Clerks have the authority to create new appointment time slots for the clinics they manage.
Select the Single time radio button, and enter:
- the date (using the calendar pop-up)
- the duration of the appointment
- the maximum number of appointments available
- which services(s) at this location require this appointment time slot
- the media through which the patient can make their appointment booking
- the time of the appointment
- a description or any additional information (optional)
The appointment will be available for booking immediately after selecting Create.
This can also be done by clicking Add time on the desired date in the Service timetable.
What if I need to create multiple appointment time slots?
Complete the appointment details as for a single time slot, this time selecting the Multiple times radio button. Enter the Start and End times e.g. 09:00 to 17:00.

The system has the ability to create up to three embedded break times. If, for example, a (lunch) break is required, select Break time and complete the details to ensure the system will not create any appointment slots during this time. You can continue to insert another break by designating the second (and third) break times, as per the way the first was defined.
If you would like the appointment(s) you create to recur, select the This is a recurrent appointment time option. You can then decide how often you would like the appointment to recur, and when you would like it to stop.
Finally, to implement the selection, select Create.
All time slots specified in the Time recurrence section will be created at once. They will not be scheduled for creation at a future time.
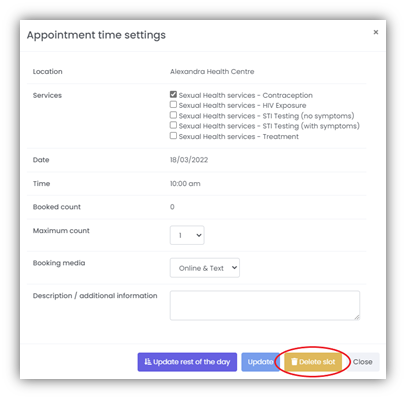
How do I delete an appointment slot?
Appointment slots can be deleted via the Appointment time settings window. Navigate to
Bookings > Add new times
and click the spanner icon that appears when hovering over the appointment slot that you wish to delete. Click the Delete slot button at the bottom of the window. You will be prompted to confirm the action before the slot is deleted.
Using the Cancel entire day button on the Service timetable page, all booked appointments on that day will be cancelled, and all time slot availabilities will be set to 0. Notifications will automatically be sent out for any cancelled appointments.
Slots shared between multiple services will be cancelled for all services.
Alternatively, the Clear entire day button can be used to delete all non-booked slots on a selected date.